No products in the cart.
Stock Library Pro Documentation
1.INTRODUCTION
Website URL : https://industry-pro.com/
Admin Login URL : https://industry-pro.com/wp-admin
This plugin consist of main three panels:
- Network Admin Panel
- Main Site Admin Panel
- User Panel
Network Admin can install the plugin & can handle the restrictions to categories.Whereas Main Site admin can Create/Manage Categories & user can use images into site.
NETWORK ADMIN PANEL
- Installation
- Activate Plugin
- License Activation
- Stock Library Management
MAIN SITE ADMIN PANEL
- Manage Categories
SITE OWNER PANEL
- Adding Stock Library Images to Library
- Using Stock Library Images
2.NETWORK ADMIN PANEL
NOTE :-> Please setup the Network Admin for multiple site. If already done please follow the following setps.
2.1.INSTALLATION
After successful login to backend:
1. Upload or extract the documentation folder to your site’s wp-content/plugins/directory. You can also use the Add new option found in the Plugins menu in WordPress.
2. Enable/Activate the plugin(App) from the Plugins (Apps) menu in WordPress.
2.2.LICENSE ACTIVATION
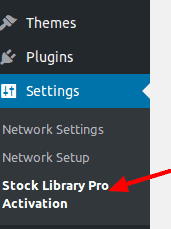
- After activation, a new page of plugin configurations is added under Settings tab. ( see screenshot )
path: Go to Network admin -> Settings -> Stock Library Pro Activation
Screenshot:->
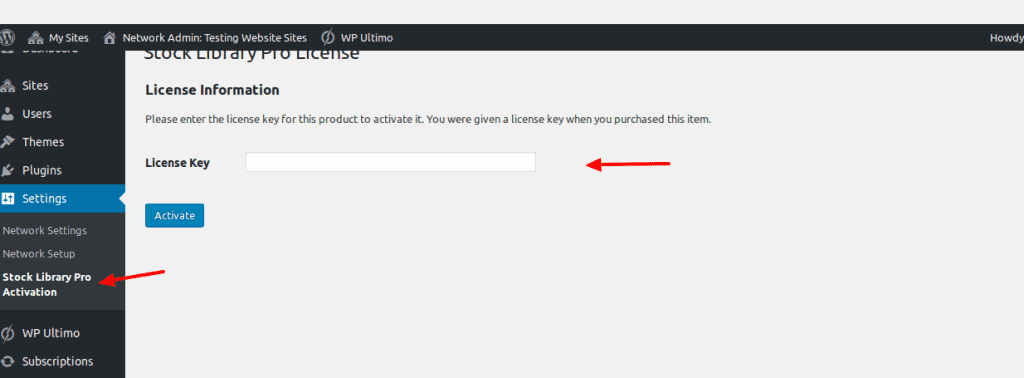
2. To activate license ( Go to Network admin -> Settings -> Stock Library Pro Activation ) add License key &click Activate button. ( see screesnshot )
Screenshot:->
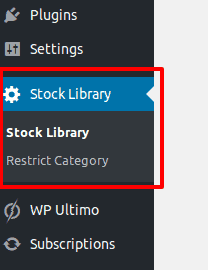
After lincense is activated, a new settings is added to Network admin sidebar ( see screenshot ).
Screenshot:->
2.3.STOCK LIBRARY MANAGEMENT
This is the Global configuration of plugin which reflects to all templates/sites.1. To manage features ( path: Go to Network admin -> Settings -> Stock Library ) .
- Stock Library
- Restrict Category
2.3.1STOCK LIBRARY/ ASSIGNING IMAGES TO CATEGORIES
- It contains list categories & sub categories ( path: Go to Network admin -> Settings -> Stock Library> Stock Library ) with respective list of images added inside.
Screenshot:
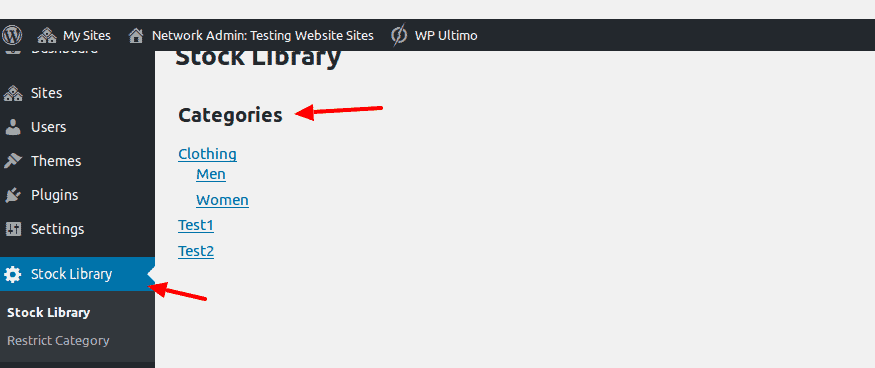
- Click on category need to edit e.g Clothing ( see screenshot ). The list of images added appears.
Screenshot:->
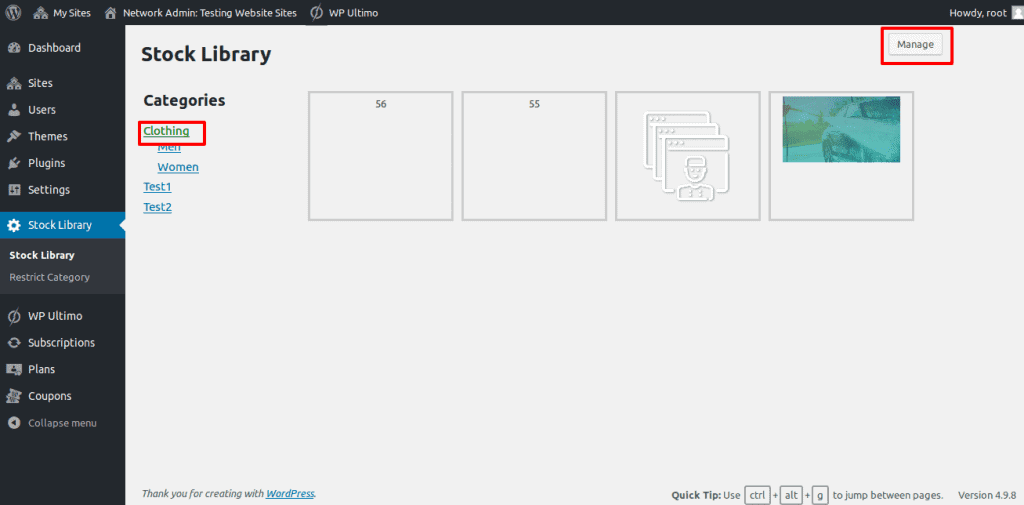
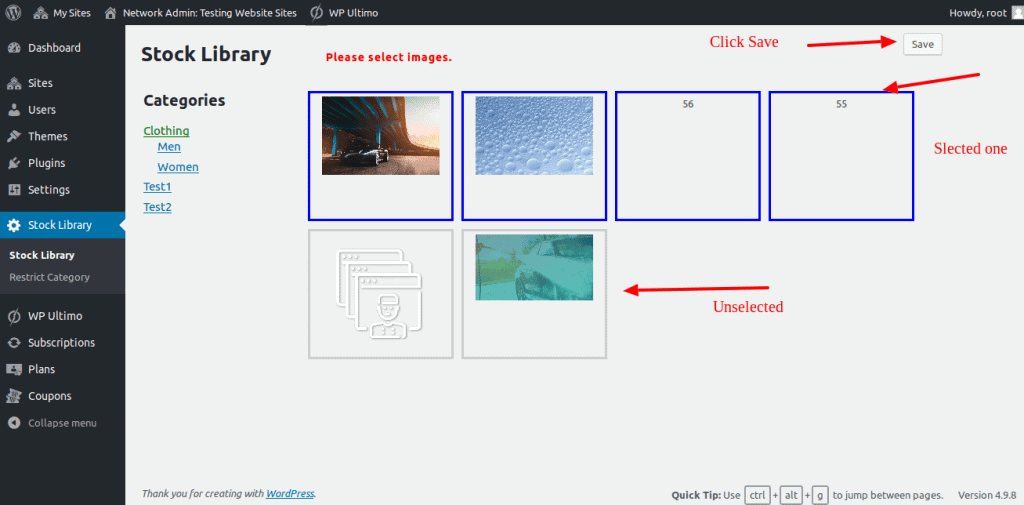
- Click on Manage if wanted to add more or delete listed. ( see screenshot ).Three images are already there, admin can select/deselect images & then Click Save button. ( see screenshot )
- For example, deselected one icon here & added one more image.( see screenshot )
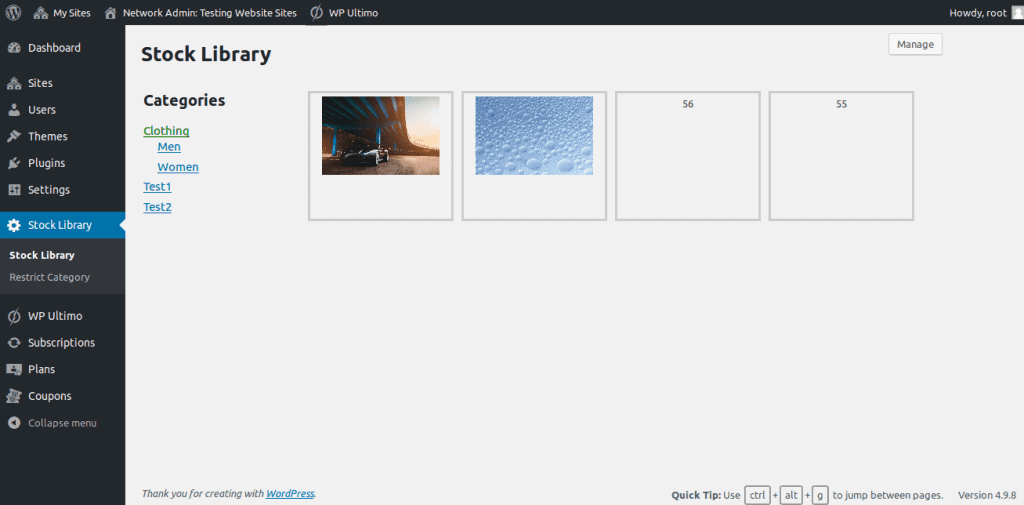
- Here is the new list of Clothing Category now ( see screenshot )
2.3.2RESTRICT CATGEORY
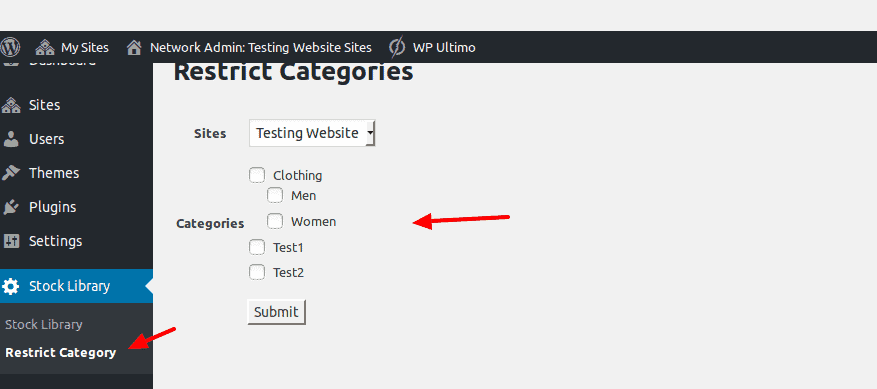
- Here Network admin can restirct categories ( path: Go to Network admin -> Settings -> Stock Library> Stock Library ) to sites inside.
Select site from Dropdown & check category want to restrcit for selected site & Click Submit. The selected category images will not be shown to selected site in SITE ADMIN.
Screenshot:->
3.MAIN SITE ADMIN PANEL
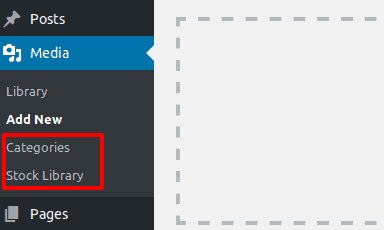
This panel is main site Dashboard . Plugin adds the two new menus under Media settings i.e Categories & Stock Library.
Screenshot:->
4.CATEGORIES
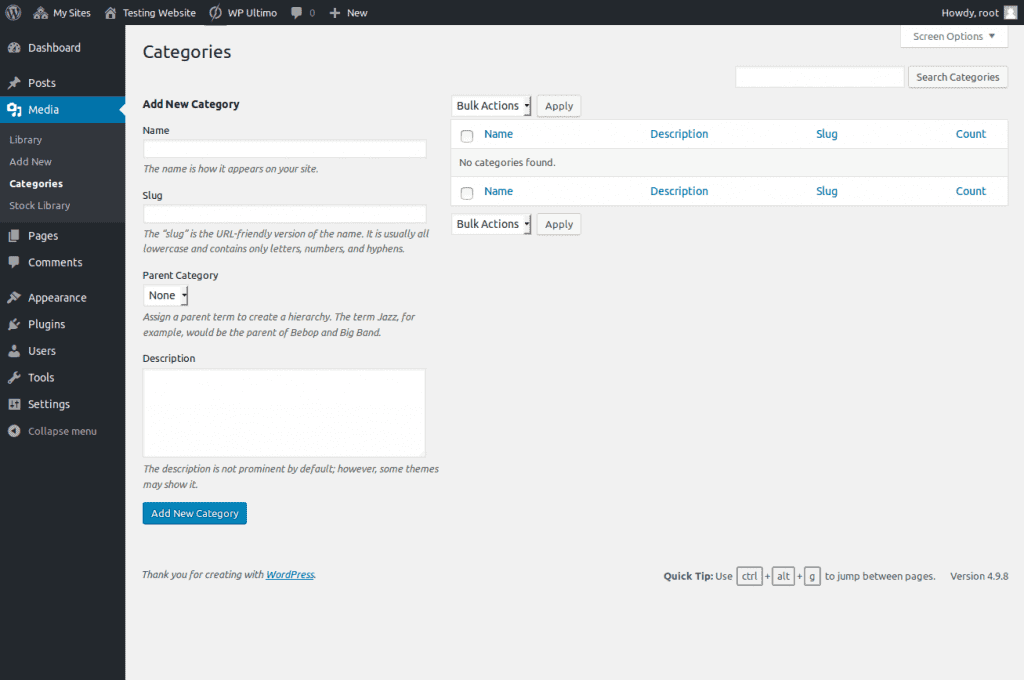
Main Site Admin can Create categories ( path: Go to Site Dashboard -> Media -> Categories ) here.
Currently there’s no category to applicator site Dashboard ( see screenshot )
Screenshot:->
- To add New category add information as follows e.g added category ‘applicator’ as a sub category of.
Screenshot:->
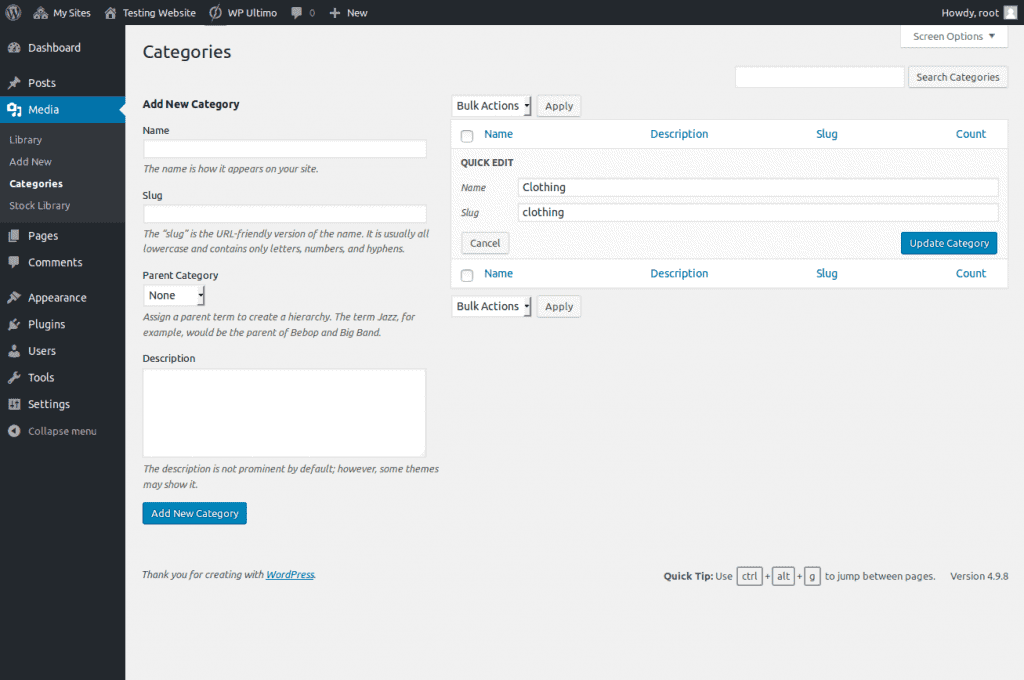
- Now this category will be visible in Stock Library categories where MAIN SITE ADMIN can add images into this category.
- MAIN SITE ADMIN can delete/update the categories too on this page.
Note: The newly added category will be managed by Network Panel & Network admin can assign images to this catgeory as explained earlier (path NETWORK ADMIN PANEL> STOCK LIBRARY MANAGEMENT).
5.SITE OWNER PANEL
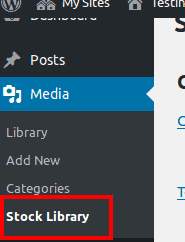
In Site Owner Panel, this plugin also introduced setting for Stock Library. Owner can add the Stock images to Library & can use everywhere in website ( see screenshot )
Screenshot:->
Adding Stock Library Images to Library:->
- User can add Stock images to site’s media libray from any category. ( see screenshot ) path: Go to Site -> Media -> Stock Library > Click desired category
Screenshot:->
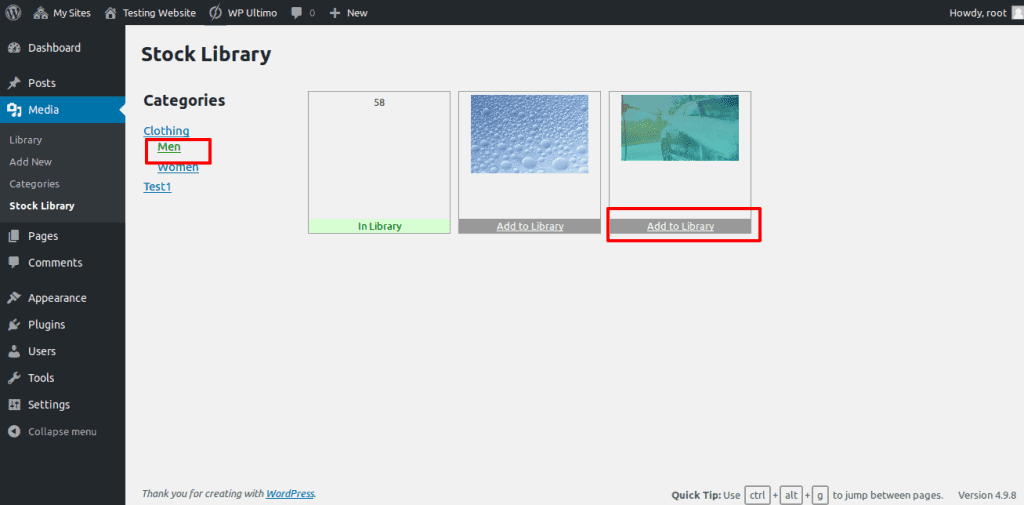
- List of stock images from Men Category is shown. To add particular image to your Library Click on Add to Library button.
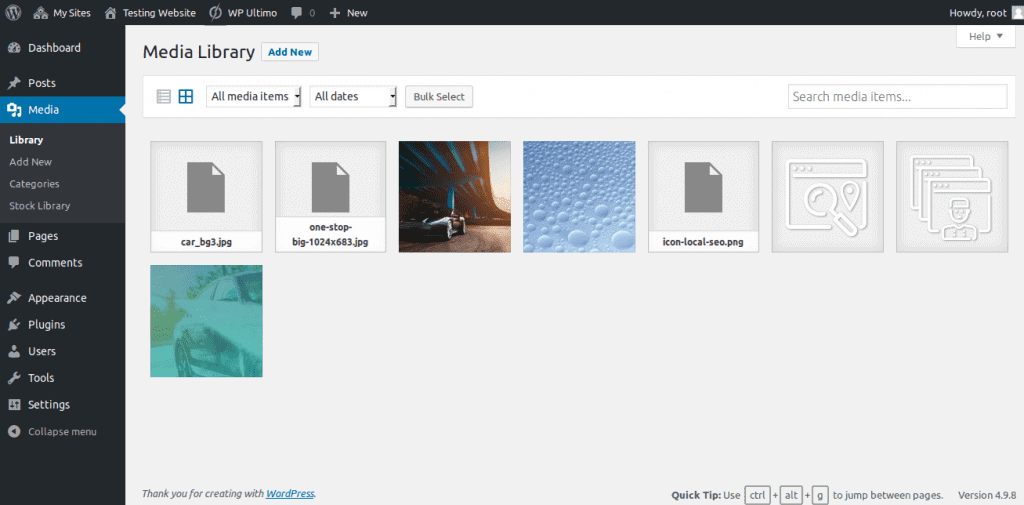
- For example added the Ist & 3 rd image to library & its in site’s Library ( see screenshot )
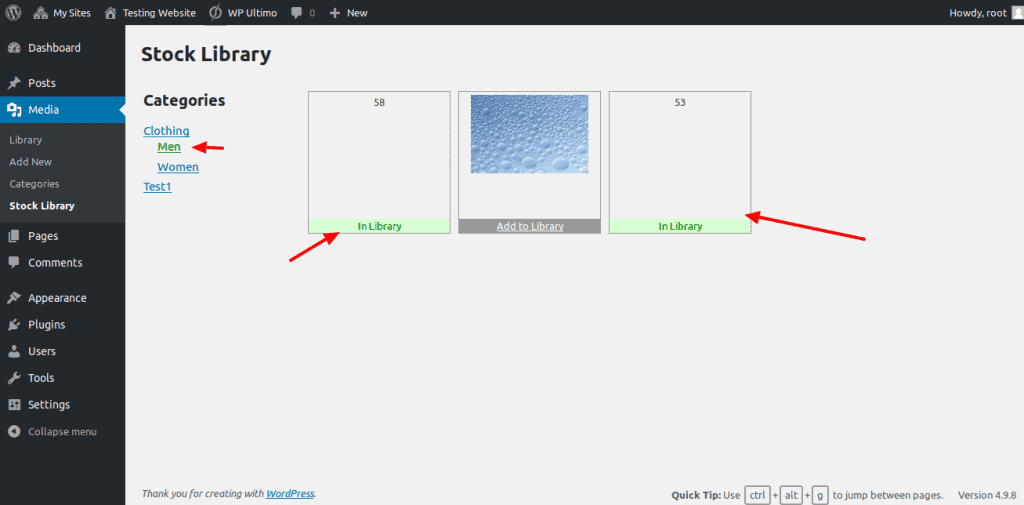
- Added Images in Media Libray ( see screenshot )
Using Stock Library Images:->
- Because the stock images added are in site’s Media Library now, so we can use in Any Editor.
Example using in Elementor’s Editor: Open the page of site you wanted to edit with Elementor’s editor & add a image Element. ( see screenhot )
Edited the HOME PAGE & ADDED THE IMAGE BOX ELEMENT .

- Now, Click on Choose Image & added stock images are in list ( see screenshot ) . Choose the image you wanted to add.

- After selecting the image & click insert Media stock image is added to Element ( see screenshot )

NOTE: Because the images are in Media Library after you add them from Stock Library, can be used anywhere i.e in Beaver Editor, WordPress Editor etc.


