No products in the cart.
Site Analytics Pro Documentation
1.INTRODUCTION
Author : Blitz Site Analytics Pro
Author URI : https://www.waas-pro.com
Tags : Site Analytics Pro, WordPress, MultiSite, SingleSite
Requires at least : 4.5
Tested up to : 4.9.8
Requires PHP : 5.5
Plugin Description
Enables Blitz Site Analytics for your site with statistics inside WordPress admin panel. Single and multi site compatible!
This Plugin can be used for:
1. Network Website 2. Single Website
2.ADMIN PANEL
● Installation
● Activate Plugin
● License Activation
2.1.INSTALLATION & ACTIVE PLUGIN
After successful login to Network Admin
1. Upload or extract the documentation folder to your site’s wp-content/plugins/directory. You can also use the Add new option found in the Plugins menu in Network Admin.
2. Enable/Activate the plugin from the Plugins menu in Network Admin.

2.2.LICENSE ACTIVATION
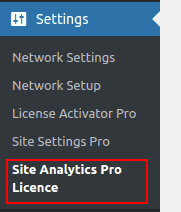
1. After network activation, a new page of plugin configurations is added under Settings tab. ( see screenshot ) path: Go to Network Admin -> Settings ->Site Analytics Pro Plugin Activation
Screenshot:->
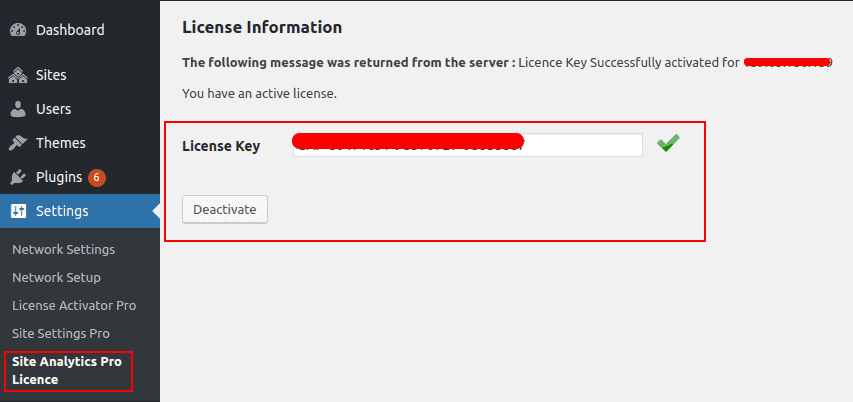
2. To activate license ( Go to Network Admin -> Settings -> Site Analytics Pro Activation ) add License key & click Activate button. ( see screenshot )
Screenshot:->
3.SITE ANALYTICS SETTINGS
NETWORK SETTINGS / GLOBAL SETTINGS
=> After License Activation you can proceed to settings (Follow steps below)
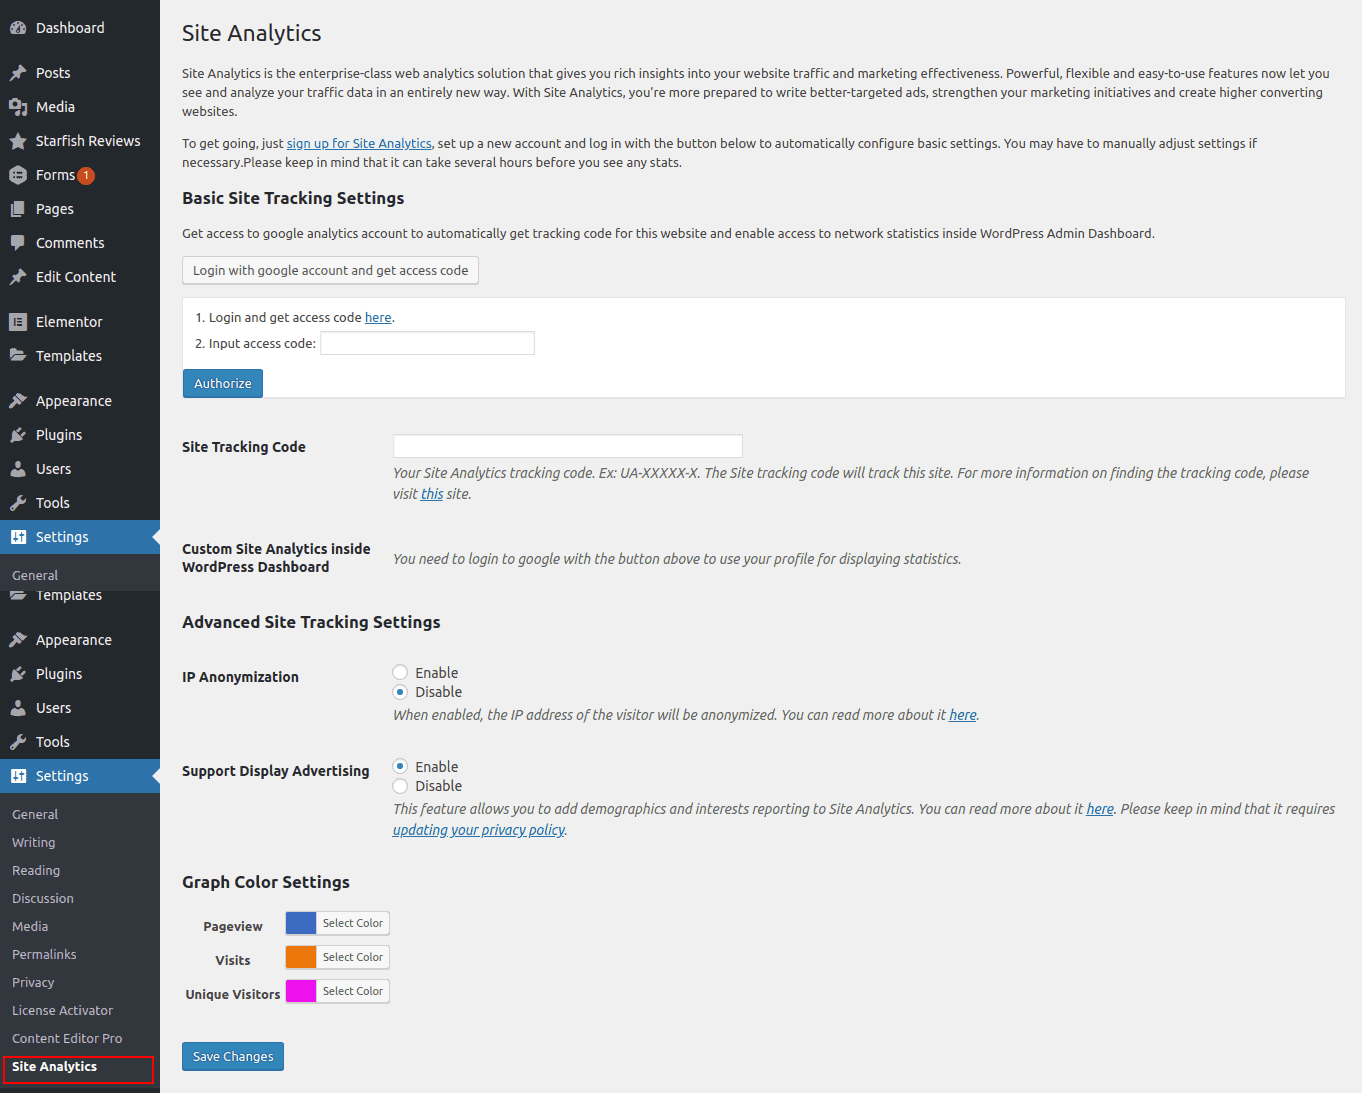
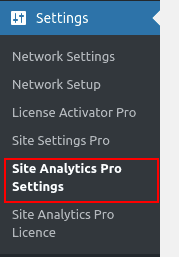
Network Site Steps :- Network Admin -> Settings -> Site Analytics Pro Settings (see screenshot below)
=> Before any settings firstly you have to get your access code from Google by clicking on link given in starting of settings i.e Basic Site Tracking Settings & then enter in “input access code” field (see screenshot below)

=> Once you get your Access Code from Google then you can set global settings for all the main sites (see screenshot below)
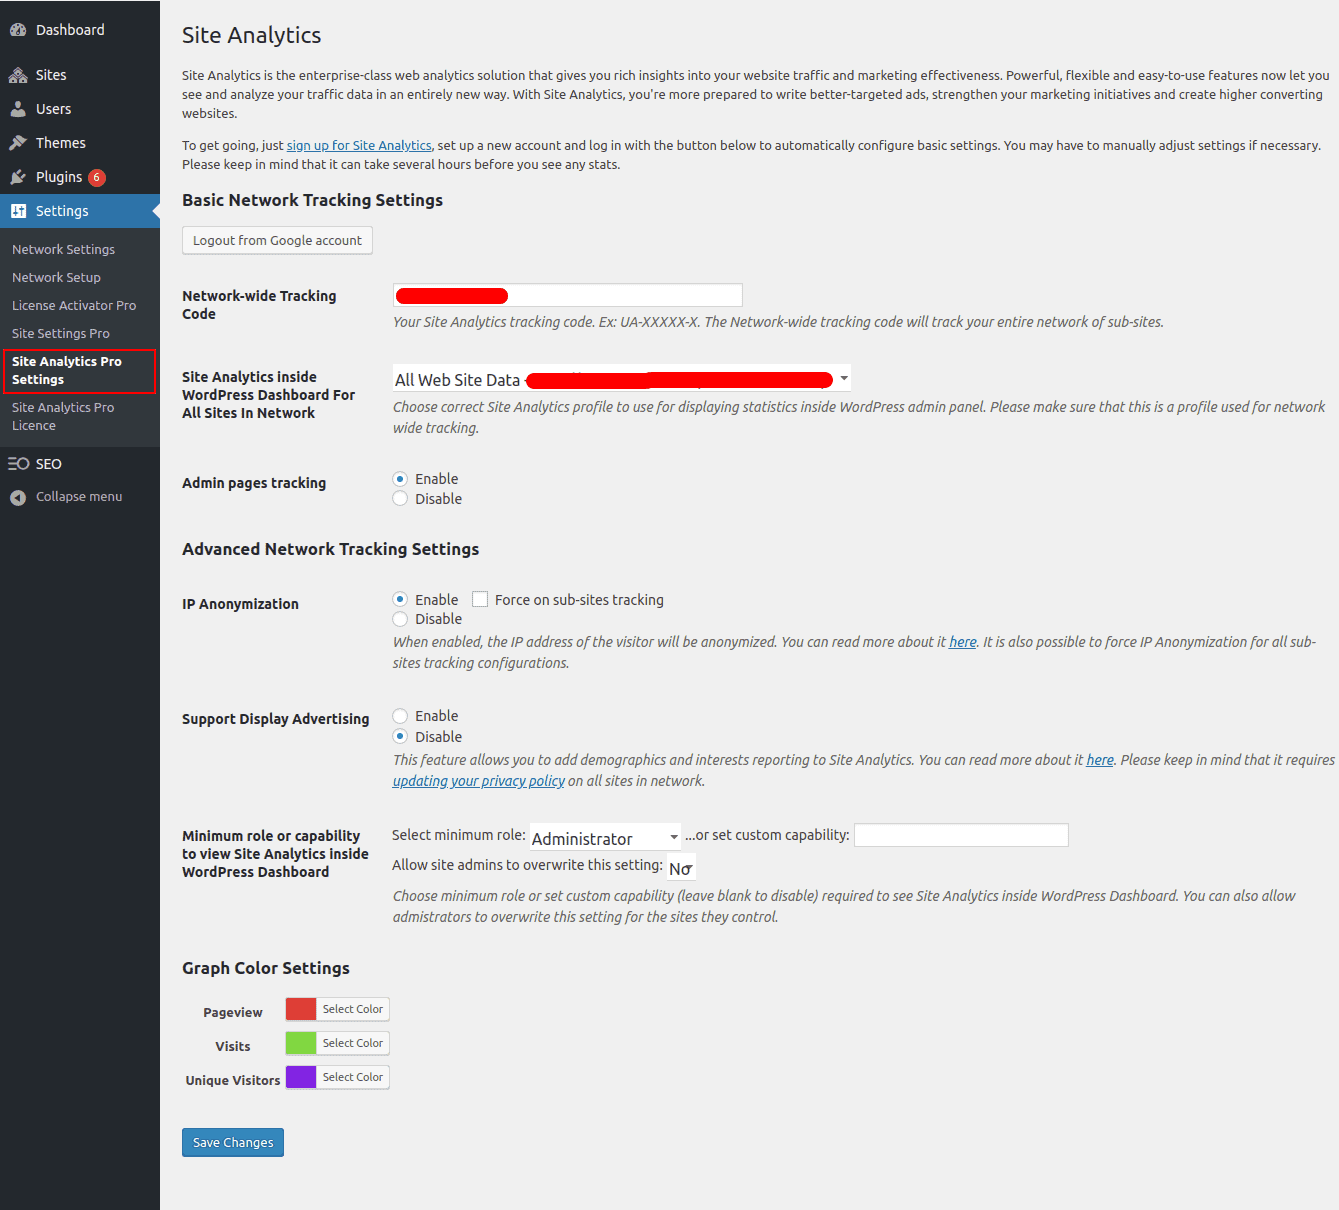
Site Analytics Options Explanation Below :-
Network-wide Tracking Code :- Enter your Site Analytics tracking code which you have got from Google. Ex: UA-XXXXX-X. The Network-wide tracking code will track your entire network of sub-sites.
Site Analytics inside WordPress Dashboard For All Sites In Network :- Choose correct Site Analytics profile here to use for displaying statistics inside WordPress admin panel. Please make sure that this is a profile used for network wide tracking.
Admin pages tracking :- You can enable or disable tracking for Admin pages here.
IP Anonymization :- When enabled, the IP address of the visitor will be anonymized. It is also possible to force IP Anonymization for all sub-sites tracking configurations using third option. It has three options i.e
- Enable
- Disable
Support Display Advertising :- This feature allows you to add demographics and interests reporting to Site Analytics. Please keep in mind that it requires updating your privacy policy on all sites in network.
Minimum role or capability to view Site Analytics inside WordPress Dashboard :- You can assign role or capability here i.e who can view or manage Site Analytics inside dashboard.
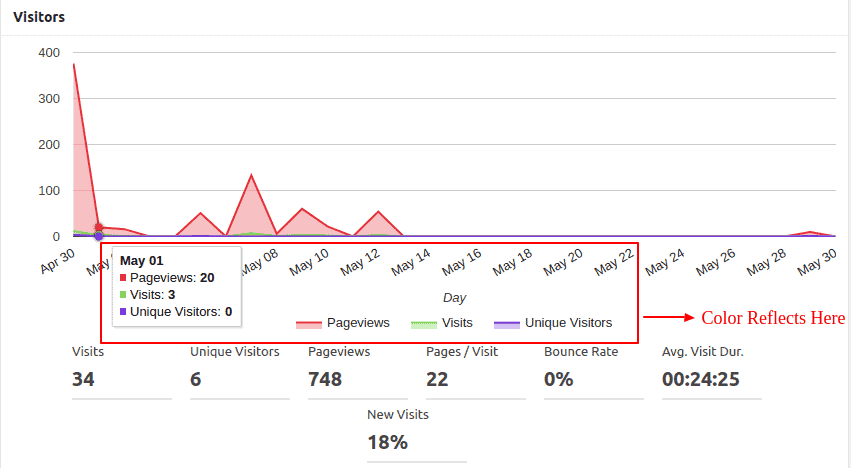
Graph Color Settings :- You can set colour for “Page-view”, “Visits” & “Unique Visitors” options coming in graph in Analytics Dashboard. (see screenshot below)
NETWORK SITE ANALYTICS DASHBOARD :-
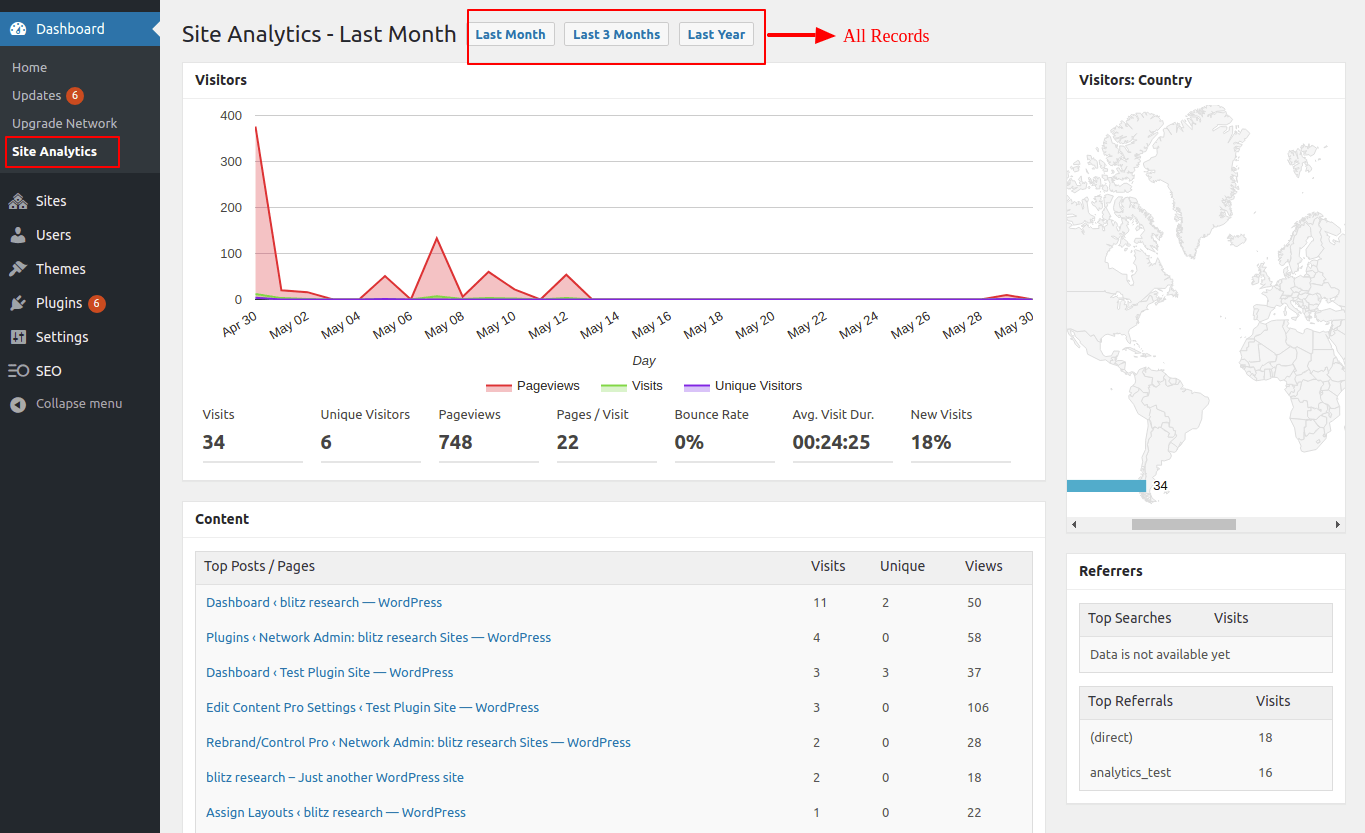
=> From here you can check your Site Analytics records for Last Month, Last 3 Months & Last Year.
=> It will help you to check all visitors records i.e
- Visitors Visits (Number Of Visits)
- Pageviews (Number of Pages Viewed)
- Unique Visitors (Number Of Unique Visitors Viewed Page)
=> From here you can check all referrals records from right sidebar.
=> It will also show you the Top Posts/Pages Visited by user.
MAIN WEBSITE SETTINGS :-
=> It is having all settings panel & dashboard view same as above Network Settings & Network Dashboard the only difference is that it is for only one main site in which you are doing all settings it will not be Global.
Main Site Steps :- Main Admin -> Settings -> Site Analytics (see screenshot below)
